Modern bikes are better than ever, but they are not maintenance-free. Hydraulic disc brakes, internal cable routing, electronic shifting, power meters, tubeless tyres and lightweight carbon components have all made bikes faster, cleaner and more capable, but they have also made small problems easier to ignore until they become expensive.
The good news is that many of the issues bike shops see every week are preventable. You do not need to become a full-time mechanic, own every specialist tool or strip your bike to the frame after every ride. You just need to notice problems early, clean the right parts, use the correct lubricant, tighten bolts properly and know when a job has moved beyond home-mechanic territory.
This guide covers seven of the most common bike maintenance problems riders run into, from seized seatposts and snapped cables to disc brake contamination, worn drivetrains, creaking bottom brackets and damaged tyres. It is aimed at road, gravel and commuter riders who want to keep their bike running reliably in normal UK conditions.
For newer riders, ProCyclingUK’s cycling for beginners guide and guide to starting cycling in the UK are useful companion pieces. Once the riding habit is there, maintenance is what keeps the bike feeling good enough to ride regularly.

Common bike maintenance problems at a glance
The most common bike maintenance problems are usually caused by wear, dirt, poor storage, missed checks or small faults being ignored for too long.
| Problem | Common warning sign | Best first step |
|---|---|---|
| Seized seatpost or stuck bolts | Parts refuse to move or bolts begin to round | Clean, inspect and reassemble with the correct grease or assembly paste |
| Snapped or sticky gear cables | Shifting becomes vague, heavy or inconsistent | Inspect cables and replace before they fail |
| Disc brake noise or contamination | Squealing, rubbing or weak braking | Keep oil away from pads and rotors, then inspect pad wear |
| Drivetrain wear | Noisy chain, poor shifting, black gritty build-up | Clean, relube and check chain wear |
| Power meter or electronic shifting problems | Inconsistent readings, missed shifts or low battery alerts | Charge, update firmware and check setup instructions |
| Creaking bottom bracket or mystery noise | Creaking under load | Check pedals, cleats, seatpost and bolts before blaming the bottom bracket |
| Tyre cuts or wheel issues | Repeated punctures, wobble or damaged tread | Inspect tyres and wheels before every few rides |
1. Seized seatposts, stuck bolts and neglected components
A seized seatpost is one of those problems that can sit hidden for months. The saddle height feels fine, the bike still rides, and there is no obvious warning. Then one day you need to adjust the position, travel with the bike or sell it, and the post refuses to move.
The issue is usually caused by corrosion, poor assembly, sweat, road salt, water ingress or the wrong compound between the frame and seatpost. Alloy posts can seize inside steel or aluminium frames. Carbon posts can become stuck too, especially if they have been overtightened, installed dry, or left untouched for too long.
How to prevent a seized seatpost
- Remove the seatpost periodically
- Wipe away dirt, salt and old assembly compound
- Inspect the post and inside of the seat tube
- Use grease where appropriate on metal-to-metal contact
- Use carbon assembly paste where recommended for carbon parts
- Tighten the seatpost clamp to the correct torque
- Check the post has not slipped after the first few rides
Prevention is much easier than rescue. Do not guess with carbon frames or seatposts, and do not simply tighten harder if a post slips.
The same principle applies to bottle cage bolts, stem bolts, pedal threads, cleat bolts, thru-axles and mudguard fittings. A small amount of attention now can prevent a rounded bolt, seized thread or expensive workshop job later.
Components to check every few months
- Seatpost and seatpost clamp
- Stem bolts
- Handlebar clamp bolts
- Saddle clamp bolts
- Pedal threads
- Bottle cage bolts
- Cleat bolts
- Mudguard bolts
- Thru-axles
- Exposed fittings that can corrode
Torque matters more on modern bikes than it did on older alloy frames with simple components. Carbon bars, seatposts, stems and saddle clamps can be damaged by overtightening, while undertightening can allow parts to slip. ProCyclingUK’s Topeak D-Torq Wrench review explains why accurate torque control is useful for home mechanics working on expensive or delicate parts.
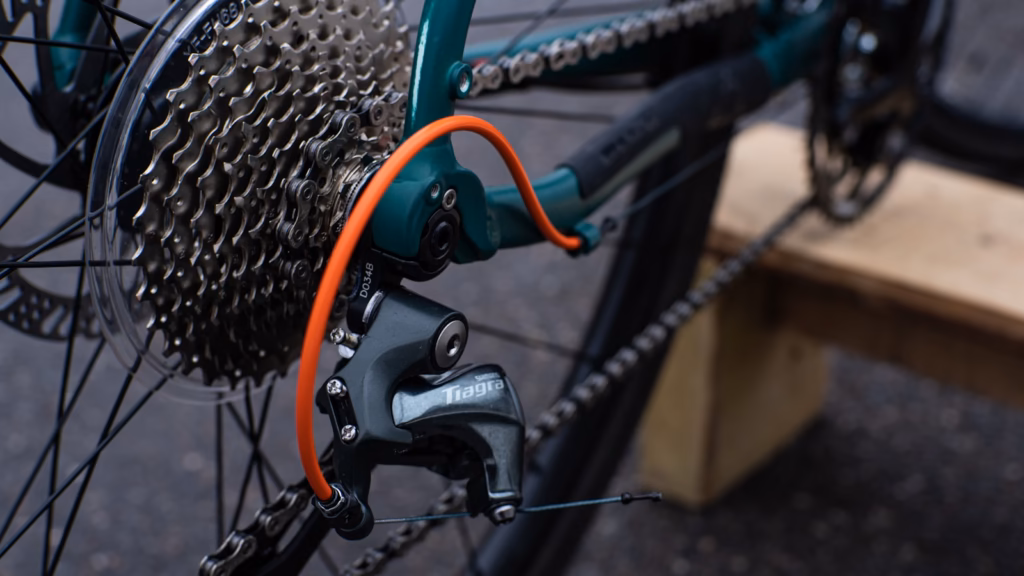
2. Snapped, frayed or sticky gear cables
Not every bike now uses electronic shifting. Plenty of bikes still rely on mechanical gears, especially winter bikes, entry-level road bikes, gravel bikes and commuter setups. Gear cables usually give warning before they fail. Shifting becomes vague. The rear derailleur hesitates. The lever feel changes. You need extra clicks to get the chain where it should be. Then, if ignored long enough, the cable can fray or snap.
Internal cable routing can make this more awkward. A cable fraying inside a shifter or frame can be much harder to remove than one that fails cleanly outside the bike. That is why shifting problems should not be brushed off for weeks.
Signs your gear cable needs replacing
- Delayed shifting
- Heavy or gritty lever feel
- Frayed cable ends
- Difficulty shifting into larger sprockets
- Inconsistent indexing
- Rust or corrosion near cable entry points
- Repeated barrel-adjuster tweaks without lasting improvement
- A cable that has not been replaced for several seasons
The basic rule is simple: if your gears have gradually become worse, do not keep adjusting the barrel endlessly without asking why. The cable may be dirty, stretched, corroded, kinked or beginning to fail.
What you can do yourself
- Inspect exposed cables for fraying or corrosion
- Check cable ends near the derailleur
- Replace clearly worn external cables
- Use the correct cable cutters rather than crushing the cable
- Add a clean cable end cap
- Avoid pulling out internally routed cables unless you know the routing path
A home mechanic can often replace external or partly external cables with basic tools, but fully internal routing can be more complicated. If the cable disappears through the frame and you are unsure how it is routed, check the bike’s manual before pulling anything out. On some frames, removing the old cable without a guide can turn a quick job into a frustrating afternoon.
For regular riders, replacing cables before they fail is usually cheaper than waiting for a broken one. It also keeps shifting crisp, which reduces the temptation to force gears under load and cause more drivetrain wear.
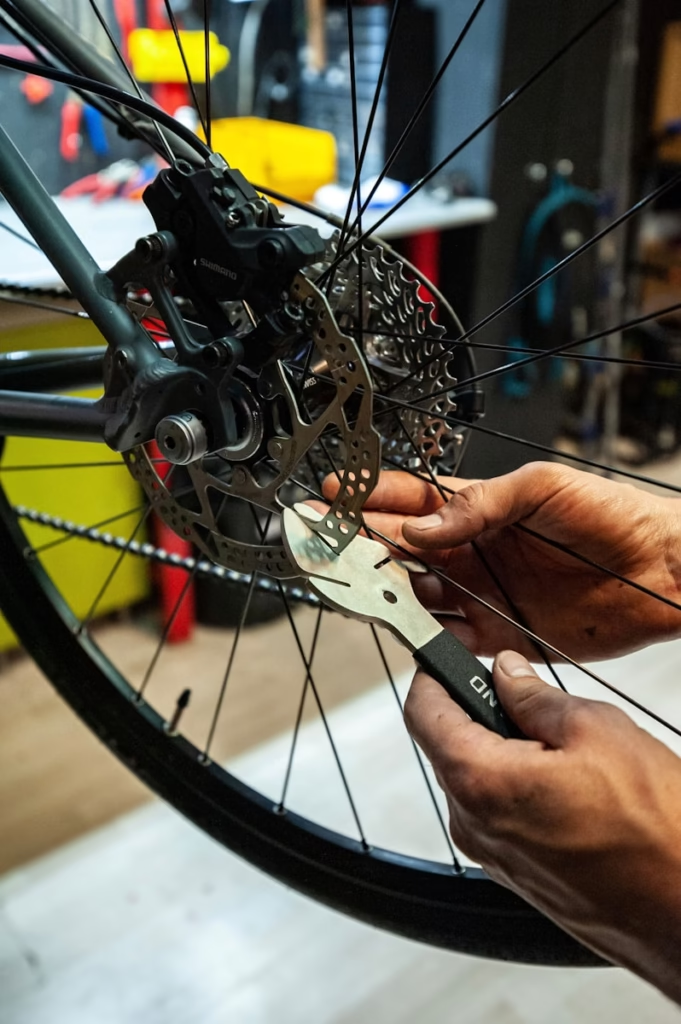
3. Disc brake noise, rubbing and contamination
Hydraulic disc brakes are now normal on road and gravel bikes. They offer consistent braking in wet weather, strong power and better control on long descents, but they also need a different kind of care from rim brakes.
The most common disc brake problems are not dramatic failures. They are smaller issues that become annoying, then gradually more serious.
Common disc brake problems
- Squealing under braking
- Rotor rub
- Weak braking power
- A spongy brake lever
- Uneven pad wear
- Contaminated pads or rotors
- Pistons that do not return cleanly
- Pads worn close to the backing plate
Contamination is the one riders often create by accident. Chain lube, degreaser, bike polish, cleaning spray and even oily fingers can all affect brake pads and rotors. Once oil gets into a brake pad, cleaning the rotor alone may not solve it. The pad can continue to squeal and lose bite.
When lubricating your chain, keep oil away from the rear rotor. Apply lube carefully to the chain rollers, wipe off the excess, and avoid spraying anything near the brake. ProCyclingUK’s guide to how to lubricate a bike chain properly explains the safer approach: clean first, apply lube to the rollers, let it settle, then wipe thoroughly.
Disc brake checks to do regularly
- Look for pad wear
- Check rotor alignment
- Listen for rubbing
- Feel for a firm lever
- Keep oil and degreaser away from pads and rotors
- Check bolts are tight to the correct specification
- Replace pads before they are worn to the backing plate
Some disc brake work is home-mechanic friendly. Replacing pads, cleaning rotors with the correct product and centring a caliper are all manageable with care. Bleeding hydraulic brakes is more involved. It requires the correct bleed kit, fluid type and procedure for your brake system. If you are unsure, it is a good job for a bike shop.
The important point is not to ignore brake issues. A noisy drivetrain is irritating. A poorly maintained brake is a safety problem.
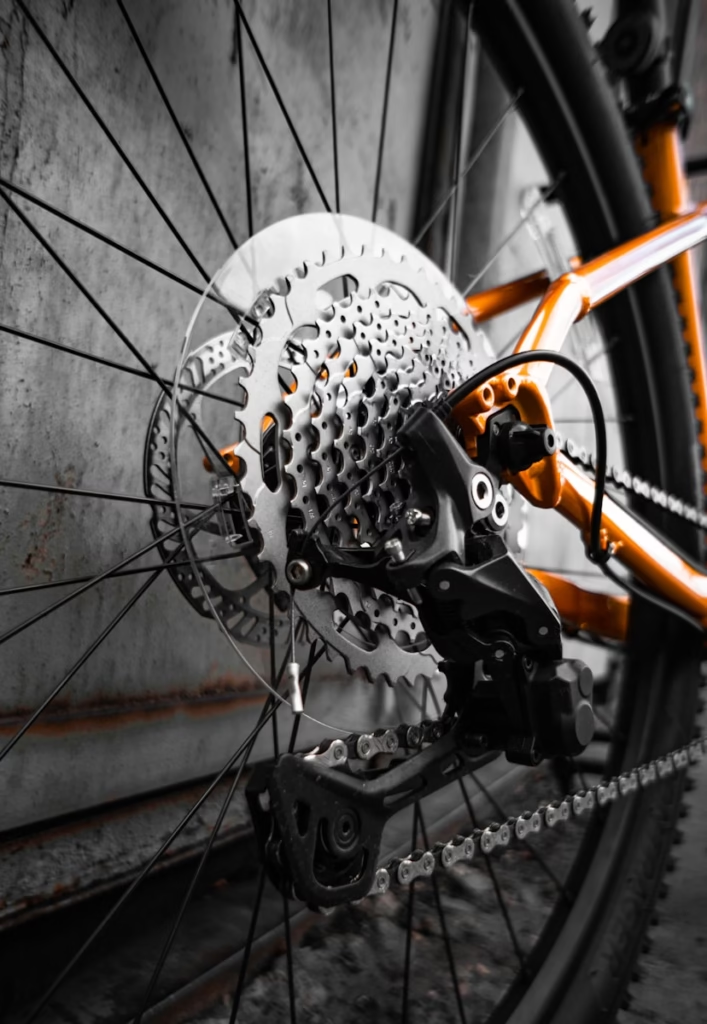
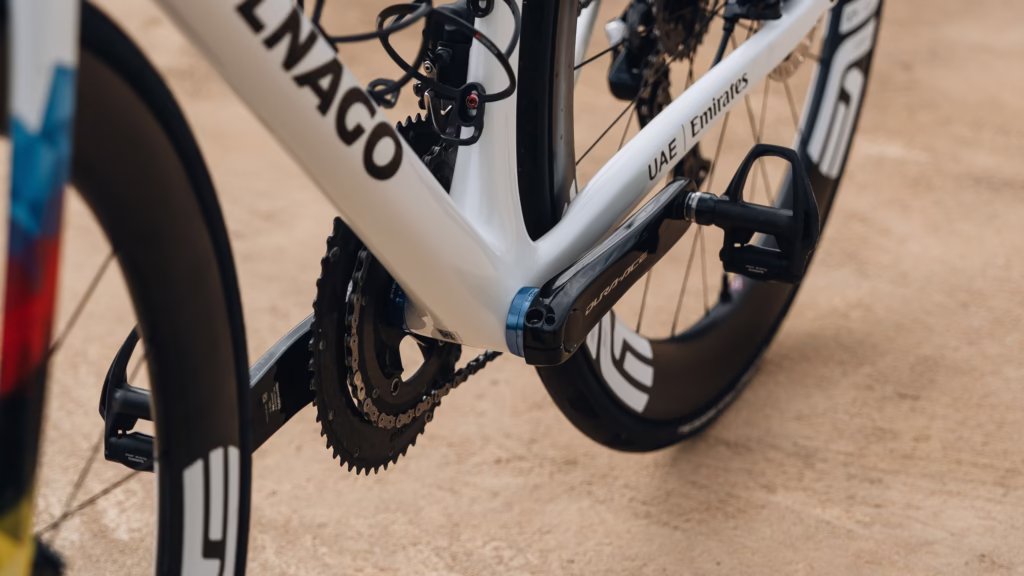
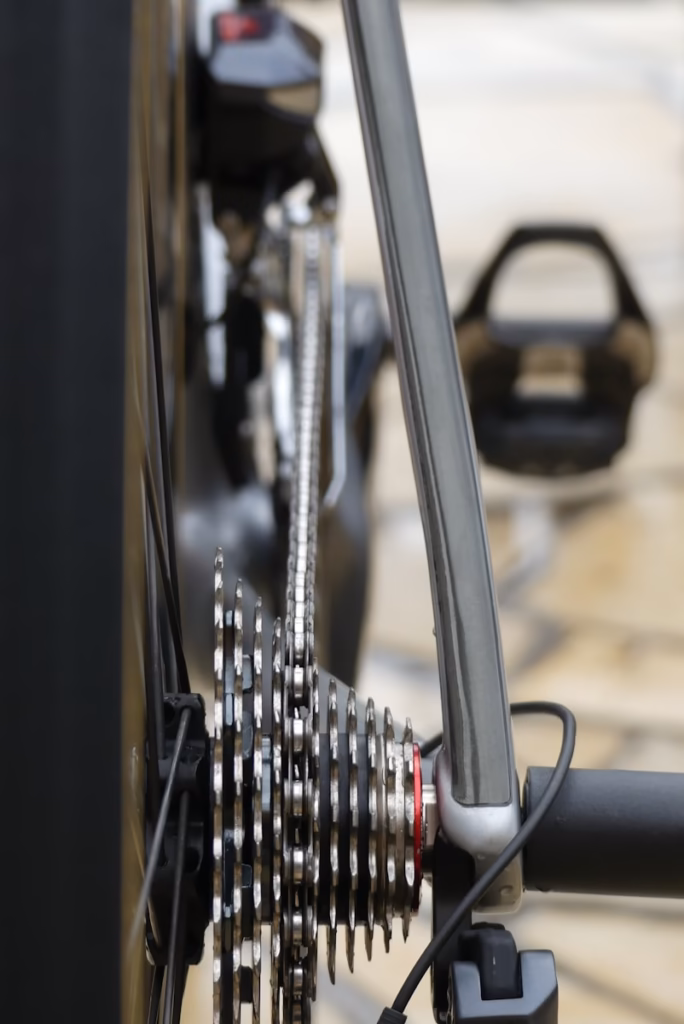
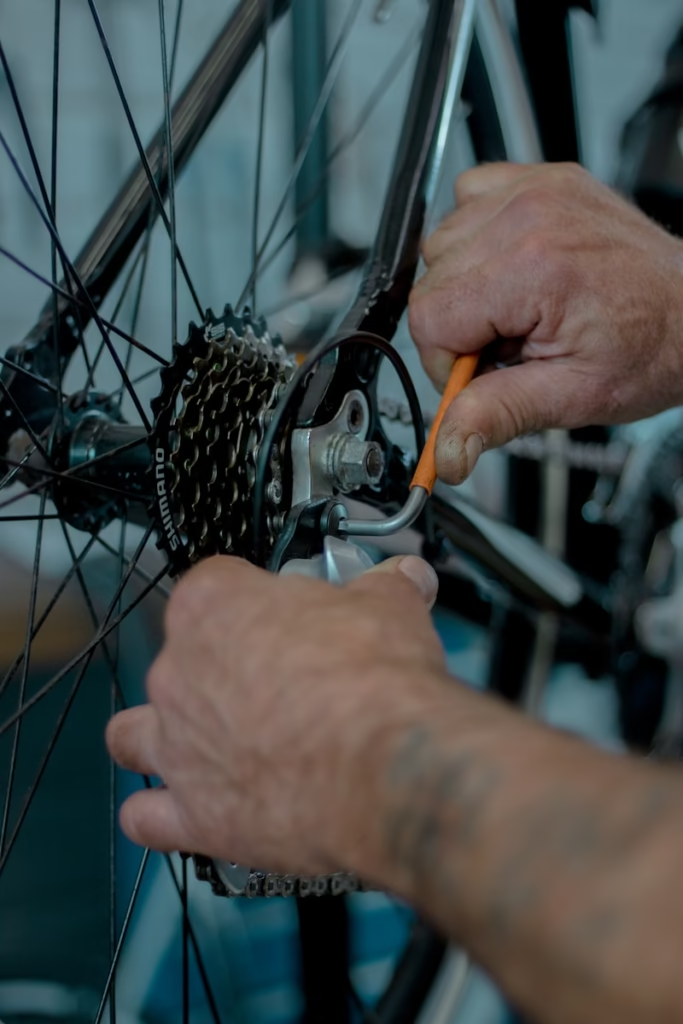
4. Drivetrain wear that gets expensive
The drivetrain is where poor maintenance becomes expensive quickly. A dirty chain does not just look bad. It wears the cassette, chainrings and jockey wheels. Leave it long enough and a relatively cheap chain replacement becomes a much bigger bill.
UK riding conditions make this worse. Wet lanes, winter salt, gritty roads, towpaths, fine dust and repeated washing can all strip lubricant or turn old lube into grinding paste. If the chain is black, gritty and noisy, it is wearing more than itself.
Signs your drivetrain is wearing out
- The chain is noisy even after lubrication
- Shifting becomes rough under load
- The cassette looks hooked or sharp
- The chain skips on certain sprockets
- The jockey wheels are packed with grime
- The chain measures as worn with a chain checker
- The drivetrain stays black and gritty after normal wiping
- New chains no longer run smoothly on the old cassette
The easiest habit is also the most effective: wipe and relube regularly. You do not need a deep clean after every ride, but you should stop the drivetrain becoming a thick paste of oil and grit. A rag, suitable chain lube and occasional degreaser will do more for bike longevity than many upgrades.
A simple drivetrain maintenance routine
- Wipe the chain after wet or dirty rides
- Apply lubricant to the rollers, not the outside plates
- Let the lube settle briefly
- Wipe off excess lubricant
- Clean jockey wheels and cassette when grime builds up
- Check chain wear with a chain checker
- Replace the chain before it damages cassette and chainrings
ProCyclingUK’s how to lubricate a bike chain properly guide goes through this in more detail, while the Park Tool CM-5.3 Cyclone chain scrubber review looks at a simple tool that can make regular chain cleaning easier. For riders considering a cleaner wax-based approach, the Squirt Chain Lube review covers how that type of lube performs in UK conditions.
Riding style also affects wear. Cross-chaining, shifting under heavy load and grinding big gears all add stress. Strong riders are often guilty of this because they can force a gear rather than shifting early. The bike will let you do it for a while, but the chain, cassette and chainrings pay for it.
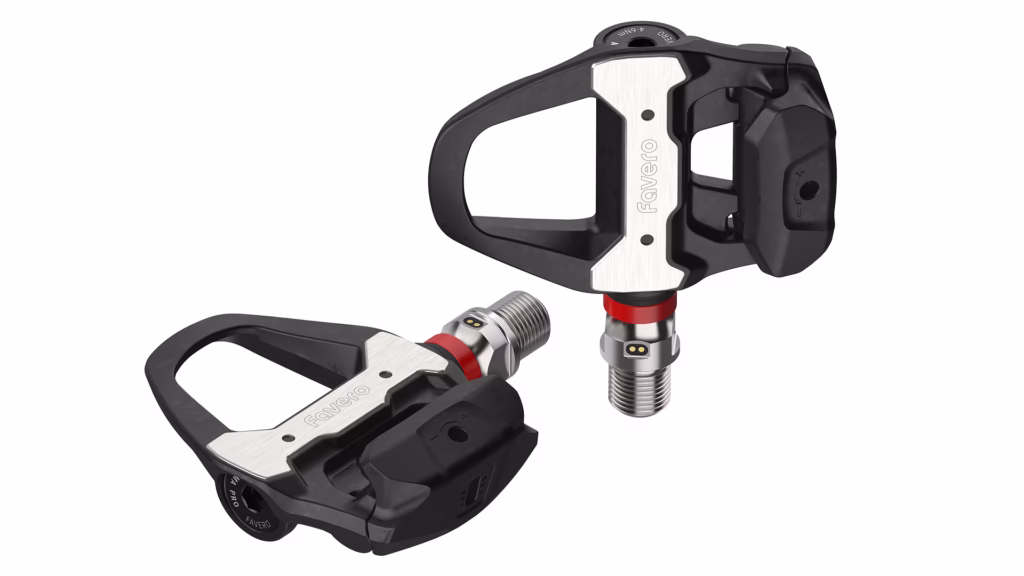
5. Power meter and electronic shifting problems
Power meters and electronic groupsets are now common well beyond the professional peloton. They are useful, but they add another category of maintenance: batteries, firmware, calibration, charging habits and app compatibility.
A power meter that reads inconsistently is not always broken. It may need a zero offset. The battery may be low. The head unit may need updating. The firmware may be out of date. The torque setting may be wrong if it is a pedal-based system. The wrong washer, spacer or installation process can also cause problems.
Electronic shifting brings similar responsibilities. Batteries need charging, wires or ports need checking, firmware updates may be required, and crash damage can knock derailleurs out of alignment. The advantage is clean, consistent shifting when everything is right. The disadvantage is that riders can forget there is still maintenance involved.
Power meter and electronic shifting checklist
- Charge electronic shifting batteries before big rides
- Keep firmware updated
- Do regular zero-offset checks on power meters
- Replace coin-cell batteries carefully
- Use the correct spacers or washers for pedal power meters
- Check torque settings on crank, pedal and spider-based systems
- Keep charging ports clean and dry
- Read the manufacturer’s instructions before replacing parts
This is one area where guessing can become expensive. Power meters are precision tools, and installation details matter. If the manual says to use a washer, use it. If the torque specification is precise, respect it. If the app flags an update, do not ignore it for months.
Common causes of unreliable power data
- Low battery
- Missed zero offset
- Old firmware
- Loose pedal or crank interface
- Incorrect installation torque
- Head unit software issues
- Temperature changes without recalibration
- Wrong crank length set in the head unit or app
Riders using power to structure training should also remember that reliable data begins with reliable setup. A faulty or poorly calibrated power meter can make training zones misleading, especially if you are using structured workouts or preparing for events.
6. Creaking bottom brackets and mystery noises
Few bike noises are more frustrating than a bottom bracket creak. The problem is that the bottom bracket is often blamed even when the sound is coming from somewhere else.
A creak under load can come from pedals, cleats, chainring bolts, saddle rails, seatpost, rear derailleur hanger, headset, thru-axles, cassette, spoke crossings or the bottom bracket itself. Modern press-fit systems and multiple bottom bracket standards have not made diagnosis simpler.
The first rule is to work methodically. Do not immediately replace the bottom bracket because you heard a noise while climbing out of the saddle.
Things to check before blaming the bottom bracket
- Pedal threads
- Cleat bolts
- Chainring bolts
- Saddle rails
- Seatpost and seatpost clamp
- Thru-axles
- Cassette lockring
- Crank bolts
- Headset
- Handlebar and stem bolts
- Rear derailleur hanger
- Spoke crossings
If the noise only happens when seated, look at saddle, seatpost and seatpost clamp before the bottom bracket. If it only happens when standing, look at pedals, cleats, crank area, bars and headset. If it happens under heavy torque in all positions, then the bottom bracket becomes more likely.
When the bottom bracket really may be the problem
- There is grinding when the cranks turn
- There is play at the crank axle
- The creak remains after pedals, cleats and seatpost have been checked
- The noise appears under load in multiple riding positions
- The bike has had repeated wet-weather use without bearing checks
- The bottom bracket has not been serviced or replaced for a long time
Bottom bracket servicing can be straightforward on some threaded systems and much more difficult on others. Press-fit systems often need specific tools, bearing presses or removal tools, and heavy-handed work can damage a frame. If there is grinding, play or persistent creaking that does not respond to basic checks, it may be time for a workshop.
The best prevention is simple: keep water and grit away where possible, avoid aggressive pressure washing, clean the bike after filthy rides and include the bottom bracket area in regular inspection.
7. Tyre cuts, wheel problems and ignored small damage
Tyres and wheels are easy to ignore until something goes wrong. A small cut in a tyre, a slightly loose spoke or a wheel that is just beginning to go out of true can feel harmless. Left alone, those small faults can become punctures, broken spokes, rim damage or an unsafe ride.
Check your tyres regularly, especially if you ride through winter, use mudguards or commute in the dark. Mudguards are useful, but they can hide tyre damage. Out of sight can quickly become out of mind.
Tyre damage to look for
- Cuts in the tread
- Flints or glass embedded in the rubber
- Bulges or sidewall damage
- Threads showing through
- Repeated punctures
- Low pressure before every ride
- Sealant drying out in tubeless tyres
Tyre pressure still matters. Too low and you risk pinch punctures, squirmy handling and rim strikes. Too high and comfort, grip and control can suffer. The right pressure depends on tyre width, rider weight, road surface and whether you are using tubes or tubeless.
Wheels also deserve regular attention. Spin each wheel and watch for side-to-side wobble. Check that the brake rotor does not rub because of a bent rotor or loose hub. Squeeze pairs of spokes gently to feel for one that is obviously loose compared with the others. A small buckle can often be corrected easily if caught early. Leave it too long and spoke tension problems can spread.
Wheel checks every rider can do
- Spin each wheel and check for wobble
- Look for loose or broken spokes
- Check the tyre sits evenly on the rim
- Inspect rims for cracks or damage
- Check disc rotors for rubbing
- Make sure thru-axles or quick releases are secure
- Listen for clicking or pinging under load
- Check tubeless sealant levels if using tubeless tyres
A spoke key is useful, but wheel truing is a skill. Small corrections are fine if you know what you are doing. Big corrections, repeated spoke loosening or cracks around spoke holes need a mechanic.
The missing habit: regular cleaning
Almost every problem above becomes worse when a bike is dirty for too long. Cleaning is not about making the bike look nice for photos. It is how you inspect it.
A clean bike shows cracks, loose bolts, worn pads, tyre cuts, cable damage, drivetrain wear and oil leaks. A filthy bike hides them. It also accelerates wear because grit sits on moving parts and turns each ride into slow abrasion.
Simple bike cleaning routine
- Rinse gently, not with high-pressure water
- Use bike cleaner or mild soapy water
- Clean the drivetrain separately
- Use brushes for cassette, jockey wheels and chainrings
- Dry the bike properly
- Relube the chain after cleaning
- Wipe off excess lube
- Check tyres, brakes and bolts while the bike is clean
Do not blast bearings, hubs, headset, bottom bracket or suspension pivots with a pressure washer. It may make the bike look clean quickly, but it can drive water into places you do not want it.
Storage matters too. A bike left wet in a shed, stored in a humid room or put away dirty after salty winter roads will deteriorate quickly. Dry the bike before storing it, especially the chain and exposed bolts.
What home mechanics should do themselves
There is a good middle ground between doing nothing and attempting every workshop job. Most riders can learn the simple, repeatable tasks that prevent bigger problems.
Good home-mechanic jobs
- Cleaning and lubricating the chain
- Checking tyre pressure
- Inspecting tyres for cuts
- Replacing bar tape
- Checking brake pad wear
- Replacing simple brake pads
- Charging electronic shifting batteries
- Checking bolt torque
- Replacing bottle cage bolts
- Cleaning jockey wheels
- Checking chain wear
- Making small saddle-height adjustments
Jobs that need more care
- Internal cable replacement
- Hydraulic brake bleeding
- Bottom bracket removal
- Headset bearing replacement
- Wheel truing
- Tubeless setup if you are unfamiliar with it
- Power meter installation
- Carbon cockpit adjustment
- Derailleur hanger alignment
None of those jobs is impossible at home, but they require the right tools, instructions and confidence. The mistake is not having a go. The mistake is forcing a job when you no longer understand what the next step is.
Basic home maintenance toolkit
You do not need a professional workshop to look after a bike properly. A sensible home kit can cover most routine checks and small adjustments.
Essential bike maintenance tools
- Track pump with pressure gauge
- Mini pump or CO2 for rides
- Tyre levers
- Spare tubes or tubeless plugs
- Multi-tool
- Torque wrench
- Chain checker
- Chain quick link pliers
- Cleaning brushes
- Chain lube
- Degreaser
- Clean rags
- Allen keys
- Torx keys
- Disc brake pad spacer
- Cassette brush
- Workstand if you clean or adjust bikes regularly
A torque wrench is especially important if you ride a carbon bike or regularly adjust bars, saddle or seatpost. It is one of the simplest ways to avoid expensive mistakes. The Topeak D-Torq Wrench review explains why this kind of tool is useful for riders who take regular home maintenance seriously.
When to go to a bike shop
A good bike shop is not a failure of self-sufficiency. It is part of keeping a bike safe and reliable. Some jobs need specialist tools, experience or diagnostic skill. Others are worth paying for because a mistake could damage an expensive frame or component.
Use a bike shop if:
- The bottom bracket is creaking and basic checks have not solved it
- Hydraulic brakes feel spongy and need bleeding
- A wheel is badly out of true
- A spoke has snapped
- A seatpost is stuck
- Electronic shifting will not diagnose cleanly
- A headset feels rough or loose
- You suspect carbon damage
- A bolt has rounded or seized
- The bike feels unsafe
A yearly service is still a good idea for riders who use their bike regularly, especially through winter. Even if you handle the basics, a mechanic may spot bearing wear, frame damage, cable issues or brake problems before they become obvious on the road.

Quick bike maintenance checklist
Before most rides
- Check tyre pressure
- Squeeze the brakes
- Check the wheels are secure
- Look for obvious tyre cuts
- Make sure the chain is not dry
- Check electronic shifting battery level if needed
Every week or two
- Wipe and lubricate the chain
- Inspect brake pads
- Check tyres properly
- Clean the drivetrain if gritty
- Check for loose bolts
- Listen for new noises
Every month
- Check chain wear
- Inspect cleats
- Check spoke tension by feel
- Clean cassette and jockey wheels
- Inspect cables or charging ports
- Check sealant if running tubeless
Every few months
- Remove and inspect the seatpost
- Check torque on key bolts
- Inspect bar tape and contact points
- Look for bearing play
- Check pedals and cleats
- Book a service if problems are building


Bike maintenance FAQs
How often should I clean my bike?
Clean your bike whenever it is properly dirty, especially after wet, muddy or salty winter rides. You do not need a full deep clean after every short dry ride, but the chain, tyres and brakes should be checked regularly.
How often should I lubricate my bike chain?
Lubricate the chain whenever it sounds dry, after wet rides, or after cleaning. Apply lube to the rollers, let it settle, then wipe off the excess. Too much lube attracts grit and can make the drivetrain wear faster.
How do I know if my bike chain is worn?
Use a chain checker. If the chain has stretched beyond the recommended limit for your drivetrain, replace it before it wears the cassette and chainrings. Skipping under load is often a sign that wear has gone further.
Why are my disc brakes squealing?
Disc brakes often squeal because of contamination, glazed pads, wet conditions or rotor issues. Keep oil and degreaser away from pads and rotors, and check pad wear before assuming the brake needs a bleed.
Is a creaking bike always a bottom bracket problem?
No. Creaks often come from pedals, cleats, saddle rails, seatpost, chainring bolts, thru-axles, headset or spokes. Check the simple parts first before blaming the bottom bracket.
What bike maintenance should beginners learn first?
Beginners should learn how to pump tyres, clean and lube the chain, check brake pads, inspect tyres, tighten bolts to the correct torque and spot obvious wear. Those basics prevent many expensive problems.
Final thoughts
Most common bike maintenance problems do not appear suddenly. They build quietly. A cable starts to fray. A chain runs dry. A tyre picks up a small cut. A seatpost stays untouched for too long. A brake pad wears thinner than expected. A creak is ignored for another week.
The answer is not obsessive workshop time. It is regular attention. Clean the bike often enough to see what is happening. Lubricate the chain properly. Use the right torque. Check tyres and brakes before they become urgent. Replace cheap wear parts before they damage expensive ones.
A well-maintained bike is not just faster or quieter. It is more enjoyable. It shifts properly, brakes cleanly, runs smoothly and makes you want to ride it more often. For most riders, that is the real value of learning the basics.