

The first obstacle to indoor cycling is often not fitness. It is discovering that the trainer will not accept the bike’s rear axle, the cassette does not match the drivetrain or a supposedly connected smart trainer is providing power data but no resistance. These problems are preventable, and solving them before buying equipment is considerably easier than dismantling a half-finished setup on a cold evening.
A practical indoor cycling setup needs surprisingly few things: a compatible trainer, a stable space, sufficient airflow, a way to record or control the ride, and enough protection for the bike and floor. The expensive accessories come later, if they are needed at all. This guide takes the process from checking compatibility to completing the first session, rather than assuming everything will work out of the box.
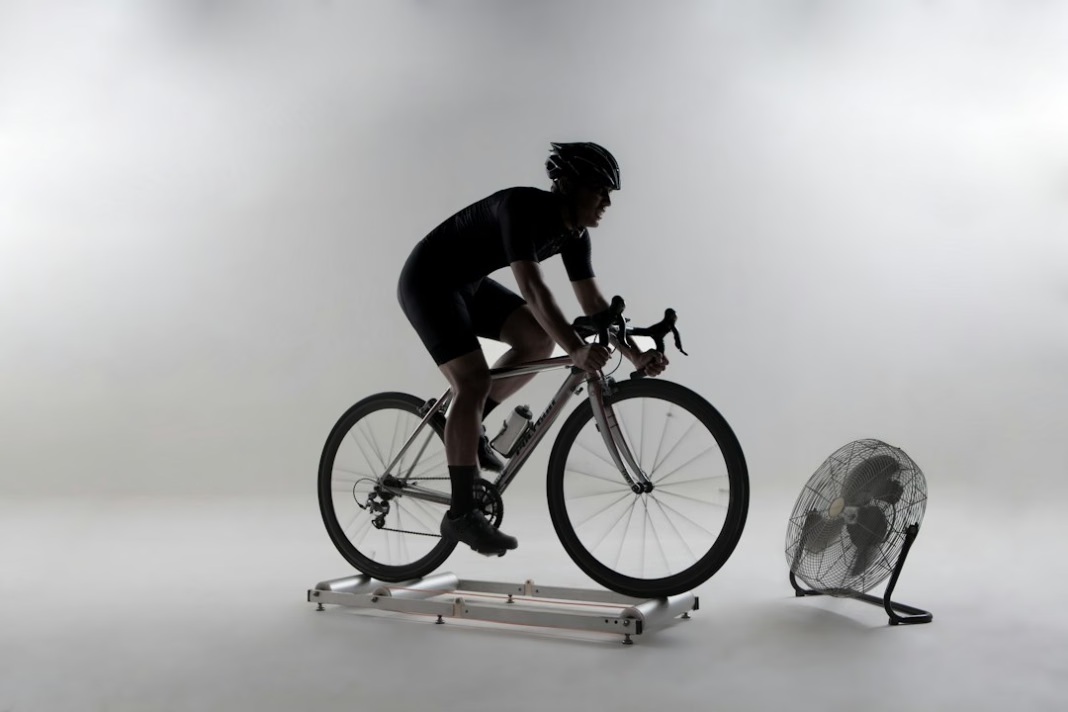 Photo Credit: Aditya Wardhana / Unsplash
Decide what kind of indoor trainer fits the riding you want to do
There are three common starting points. A basic wheel-on trainer holds the bike by its rear wheel and creates resistance at the tyre. Some are manually adjusted; smart versions can change resistance electronically. A direct-drive trainer replaces the rear wheel entirely, with the chain driving a cassette or dedicated cog fitted to the trainer. A smart bike is a separate indoor machine that does not need your outdoor bike at all.
Wheel-on trainers are useful where price and simplicity matter, although tyre choice, pressure and roller tension affect the experience. Direct-drive models are usually the more convincing solution for regular indoor training: no rear tyre rubs against a roller and many models provide electronically controlled resistance and power measurement. They do, however, require particularly careful checks of axle and drivetrain compatibility. Smart bikes remove the repeated bike-fitting problem but make a substantial investment and take up permanent space.
Think about use before specifications. For a rider doing two steady sessions a week, reliable connection and quick setup matter more than an extravagant maximum wattage. Someone racing frequently on Zwift may care about resistance response, connectivity and support for the shifting controls they intend to use. ProCyclingUK has compared the main trade-offs in its UK smart turbo trainer buying guide.
Check your bicycle’s axle and cassette before buying anything
For a direct-drive trainer, the crucial questions concern the frame, rear axle, drivetrain and freehub. Check whether the bike uses a quick-release skewer or a thru-axle, then identify the precise spacing specified by the bike manufacturer. A commonly used road-bike thru-axle size is 12x142mm, while some mountain bikes use 12x148mm. These are examples, not an invitation to assume every bike with a 12mm axle will fit.
Next, establish how many sprockets are on your rear cassette and what system they belong to. An 11-speed Shimano road setup and a 12-speed SRAM AXS setup are not automatically interchangeable simply because both are called modern road drivetrains. Wahoo’s published drivetrain guidance explicitly distinguishes cassette count, tooth range, chain compatibility and freehub requirements. Certain combinations need a different freehub body or dedicated cassette. Some bike frames also have clearance restrictions unrelated to cassette choice.
Do not treat a Zwift Cog as a universal fix. A single-cog arrangement can remove some multi-bike cassette complications, but the trainer, bike and software still need to support that specific configuration. The virtual-shifting feature has its own connection and controller requirements. Check the model-specific manufacturer compatibility list, not just the broad description on a retailer’s product page.
Where the cassette, axle standard or frame clearance is unclear, establish the answer before mounting the bike. Incorrectly fitted hardware can damage a frame or drivetrain and could make the trainer unsafe. Follow the trainer’s instructions for adapter orientation and tightening, and the bike manufacturer’s specification for its axle. There is no safe universal torque figure for every combination.
Choose a room that can cope with sweat, heat and movement
Before assembling the trainer, make sure there is adequate space behind the bike, clearance for getting on and off and somewhere secure for a screen, fan and water bottle. If the room is shared, think about the noise and vibration transmitted through the floor. A dense trainer mat protects the surface underneath and may help reduce some vibration, although it will not silence every trainer or eliminate sound travelling through a building.
Cooling deserves a higher place on the shopping list than most electronic upgrades. Riding outdoors creates airflow over the body; riding indoors does not. A fan directed towards the torso and face helps sweat evaporate, while opening a door or window can prevent heat and humidity building up in a small room. A cool garage is not necessarily a well-cooled training space if the air around the rider barely moves.
Place cables away from the drivetrain, rotating parts and any route used to dismount. Keep children and pets clear of the trainer while it is operating, especially around the flywheel, chain and rear dropout. Ensure the floor is stable and the trainer cannot rock or slip. For detailed advice on fans, mats, towels and keeping moisture away from expensive components, see ProCyclingUK’s turbo trainer comfort and bike-protection guide.
Fit the bicycle to the trainer safely
Build and stabilise the trainer according to its own assembly guide before lifting the bike into place. Some models need their legs secured with a specified torque; others have folding mechanisms or a locking arrangement. Use only the adapters supplied or approved for the exact trainer and axle configuration.
With a direct-drive model, remove the bicycle’s rear wheel and carefully lower the frame onto the trainer. Position the chain on the appropriate sprocket or dedicated cog as described in the trainer instructions. It should sit securely in the correct position without forcing the derailleur or frame sideways. Refit the axle or skewer to the bicycle and trainer manufacturers’ requirements. Before riding, check that the chain runs freely and that the rear derailleur, frame and brake components have suitable clearance.
Wahoo’s official KICKR CORE 2 setup guide illustrates why model-specific instructions matter: the orientation and combination of adapters differ between quick-release and thru-axle arrangements, and the cassette and Zwift Cog mounting procedures are not identical. It also specifically warns against using a trainer before the skewer or axle is secured correctly. If any part of the assembly feels forced, stop and resolve compatibility rather than applying more leverage.
For a wheel-on trainer, use the approved skewer or axle fitting if required, ensure the rear wheel is properly retained and set the roller tension according to the trainer maker. Consistent tyre pressure and roller contact are important for repeatable resistance and for reducing wheel slip. A front-wheel block may be helpful or required for particular arrangements; do not assume every trainer needs one.
Connect the trainer to Zwift or another training application
There are two distinct functions to establish: the application needs a source of speed or power, and a controllable smart trainer must receive resistance commands. Cadence, heart rate and virtual-shifting controls are additional channels. A trainer that appears on the pairing screen is not necessarily configured to handle all of them.
Zwift’s own pairing guidance says a rider needs at least a power source or speed sensor to move in the virtual world. On a compatible smart trainer, pair the device as a power source and, where supported, as a controllable resistance device. Add cadence, heart rate and any dedicated controls as appropriate. If a separate power meter is being used as the preferred power source, configure that deliberately rather than letting different apps select devices at random.
Bluetooth, ANT+ and Wi-Fi are not interchangeable for every function. Zwift currently specifies a Wi-Fi or Bluetooth trainer connection for virtual shifting, rather than ANT+. Some controller arrangements have additional Bluetooth requirements; verify the precise combination recommended by the trainer and controller manufacturers. For a permanent setup, ensure the receiving computer or tablet supports the relevant connection standard and can remain close enough for a reliable signal.
If the trainer does not show up, wake it by turning the pedals and check whether another app or phone has already taken the Bluetooth connection. Close competing training apps, update the trainer firmware through the manufacturer’s app where advised, and retry one device at a time. These checks are more useful than buying new sensors before knowing where the connection has failed.
Run the right calibration and firmware checks
Not every smart trainer needs the same calibration routine. Some modern direct-drive models calibrate automatically; other trainers, particularly wheel-on designs, may use a spin-down procedure once warmed up. Use the manufacturer’s instructions for your specific model and firmware rather than following an old generic tutorial that tells every rider to perform a spin-down.
Firmware updates can alter connectivity, resistance behaviour and compatibility. They are best performed before an important session, with the trainer powered and the updating device kept nearby, rather than five minutes before a virtual race. After updating, revisit the pairing screen and check all expected channels. A simple steady effort should result in believable power and cadence readings and, for a controllable trainer, a discernible resistance change when the programme calls for it.
If displayed power seems strange, first check units, sensor selection, drivetrain behaviour and any calibration requirements. Indoor readings may differ between a trainer and a bicycle power meter because the devices measure power at different points and use different measurement systems. A small difference does not automatically mean that either device is faulty.
Make the first indoor ride a short systems check
Resist the temptation to make the first ride a maximal FTP test. Spend 15–20 minutes pedalling easily and check the mechanical and electronic basics: the bike sits securely; there are no unusual rubbing sounds; the chain remains aligned; resistance responds predictably; and the connection remains stable. Dismount safely to adjust the fan or screen rather than reaching across moving drivetrain parts.
Then test one or two short changes in effort. If using ERG mode, where the trainer automatically adjusts resistance to hold a target power, select a modest interval that is easy to control. If you plan to ride simulated gradients, confirm that changes in the virtual route translate into the expected resistance behaviour. Familiarity with the controls matters more than completing a hard workout on the first attempt.
Once the equipment works, wipe down the bike and the nearby floor. Sweat can collect around the bars, headset and trainer fasteners even during relatively short rides. Remove wet towels rather than leaving them against metal components, and check that the trainer and power supply have been left as recommended by the manufacturer.
What you do and do not need for a useful home setup
A compatible trainer, a safe floor space, a sufficiently powerful fan and a display or training device are enough for meaningful indoor cycling. A mat and towel are sensible practical additions. Heart-rate monitoring can be useful but is not a prerequisite for every session. A dedicated screen, rocker plate, smart fan, desk and elaborate lighting may improve convenience, but none replaces reliable mechanical fit or airflow.
Nor does every rider need a paid virtual-cycling subscription. Some smart trainers can run workouts through manufacturer software or other training applications, depending on the model and current service terms. Riders who enjoy virtual racing or group rides may place greater value on Zwift, while somebody working through prescribed intervals may prefer a simpler display. If the available screen is a tablet, the ProCyclingUK comparison of tablets for Zwift is a useful next check.
For anyone returning to regular training in November or December, a modest, repeatable setup has an advantage over a complex system that takes half an hour to assemble. The winter base-fitness guide provides a starting point for deciding what those indoor sessions should accomplish. An axle adaptor checked before purchase and a fan already pointing at the bike will do more for the first week of riding than another accessory left in its box.

